Here at Dalinghaus, we believe helical piers are a heckuva good time – heliarious even.
Helical piers are so effective at impeding foundation settlement and foundation heave (both of which can be directly attributed to expansive soil) they are now the industry standard for quality foundation repair.
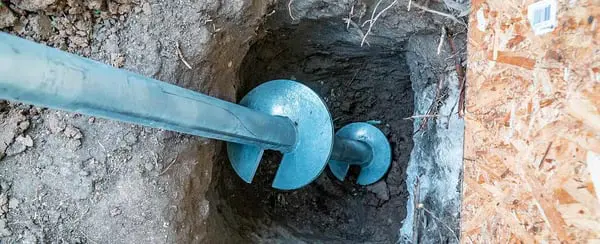
Helicals differ from push piers and other steel systems in that they have helices (circular sections similar to a staircase or corkscrew) welded to the bottom of the galvanized pipe.
These helicals anchor the structure they are attached to. Imagine your home sitting on underground stilts that are embedded in load-bearing soil or bedrock.
The helicals ensure your home won’t go up and won’t go down, it’s locked into place.
In this article, we are going to cover the 5 main steps of helical pier installation:
- The Inspection
- Prep Work
- Installation
- Lift / Stabilization
- Final Walkthrough
1. The Inspection
The initial step of every foundation repair project is an inspection. A qualified professional locates and diagnoses signs and symptoms of foundation failure –
A complete and thorough inspection examines the interior and exterior of the home, in addition to a thorough analysis of the foundation itself – whether it be a slab on grade, post-tensioned, or raised.
By the end of the inspection, the homeowner should receive:
- Floor elevation measurements
- And a to-scale CAD drawing of the home
A full set of floor elevation measurements indicate if there is any slope, difference in elevation within the structure of the home (a clear, indicative sign of foundation failure).
Foundation settlement and foundation heave is not necessarily a uniform, across-the-board process. Occasionally, only a particular section of the structure will require attention.
We here at Dalinghuas refer to this section as the affected area and it’s one of the three primary factors of cost.
We suggest you keep the floor elevation measurements, especially if there are currently no discrepancies in elevation.
These elevations can be used as a future reference point if you suspect foundation heave/settlement in the future.
Knowledge is power. Some disreputable foundation repair companies will occasionally withhold the complete set of floor elevation measurements.
They do this in order to con the homeowner into securing the entirety of their home which can increase the scope of work outside of the affected area.
Once the inspection is complete and you have your floor elevation plans/CAD Drawing, you will be given a proposal – a rundown of the project’s cost.
This is where you’ll see if the foundation repair inspector and/or engineer has called for Helical Piers.
One of the most common reasons helical piers are implemented is because you live in a single-story home and the structure is not inherently heavy enough to drive down push piers.
After the foundation repair contract has been signed – the waiting game begins for the engineering and permitting process.
Engineering usually takes 3-4 weeks to complete.
Permitting can take anywhere between 4-12 weeks depending on the state, county, & city.
Fun Facts with Brian – In the state of California, the homeowner legally has the right to cancel a construction project within 3 days of signing the contract.
2. Helical Pier Prep Work
What is a Helical Pier?A Helical Pier is a steel circular/square pipe (utilized in foundation repair) that is hydraulically driven to competent, load-bearing soil and anchored to a structure’s prepped footing via a remedial bracket to secure, stabilize and/or lift a structure. Helical Piers are:
|
Before the Helical Piers can be hydraulically driven into the earth to reach competent, load-bearing-soil, the foundation must be prepped.
Helical piers can be utilized on many different forms of foundation:
- Slab on grade
- Post-tensioned slab
- Raised Foundations
o Cripple Wall
o Post-and-Pier
o And more
Regardless of the kind of foundation, the Helical Pier locations must be excavated.
Helical Piers are utilized every 6 feet and their positions are designated via painter’s tape so as not to permanently hurt the stucco/siding of the home.
3×3 foot excavations are dug (usually 18 to 24 inches deep) at the demarcated locations in order to create access to the foundation’s footing.
Occasionally, concrete removal and replacement is necessary to create access.
After the holes are excavated below the footing, the crew utilizes a demo hammer to flatten the footing, preparing it for the remedial bracket which will fit in an L shape to the footing.
The remedial bracket is then secured to the footing utilizing one of two methods:
Strong Bolt / Wedge Anchor –
The remedial brackets can be bolted in via “redheads” (bolts with expanding ends that lock into place after implementation) which are hammered in and then secured with a washer and bolt.
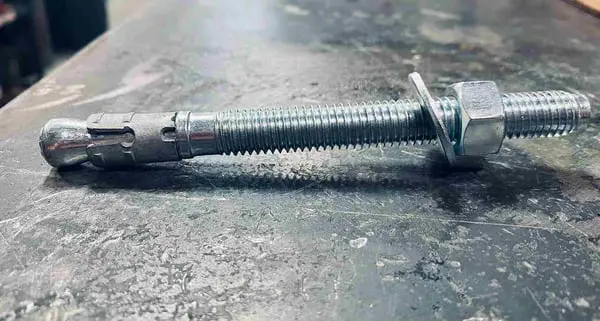
Titen Screws – The remedial bracket can be screwed in with Titen screws that are driven into the footer.
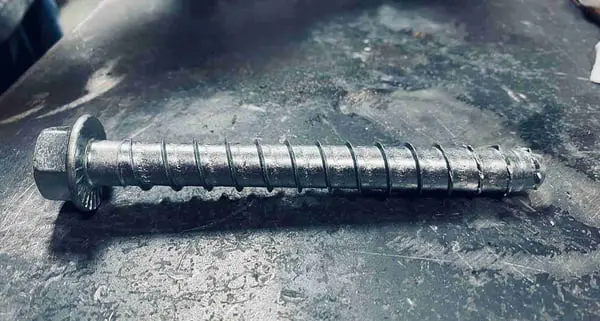
Both wedge anchors and Titen screws make it 4 to 5 inches deep.
3. Helical Pier Installation
Helical Piers, unlike Push Piers, are not pushed into the earth – they are screwed. The easiest way to remember the differences is Push Piers are like nails and Helical Piers are like screws.
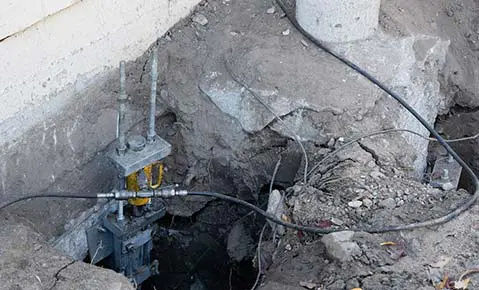
The Helical Piers are screwed down to competent, load-bearing soil. Helical piers are implemented through extreme torque via a torque motor which is pinned to a torque bar.
Torque equals the amount of force that is required to rotate the helical into the ground. Intuitively, denser soils require more torque than less dense soil.
Once the load of the home is factored in and we know the amount of helical material that will be implemented, we can calculate for torque to reach the desired loading value.
Torque Equation Example(Load Required/K-factor) x Drive Head Torque Conversion = Torque Required Let’s put it in numerical values that are similar to your home. Load required – 5,600 pounds Material Kfactor – 8 Drive Head Torque Conversion – 2.5 (5,600/8)x 2.5 = 1,750 ft/lbs of torque needed to achieve the required load. |
A torque bar is implemented to inhibit the drive head from spinning on the helical pile. The torque bar is attached to the drive head and positioned safely about 5-6 feet away.
If the torque bar is not secured to a stationary object, the torque bar will try to wipe out anything in its path.
The helical piers are then driven into the earth, connected via extensions until competent, load-bearing soil is reached.
4. Lift /Stabilization
After all of the helical piers have been safely installed at each location, the lifting process can begin. The goal of all foundation repair specialists is to achieve maximum practical recovery.
Maximum Practical Recovery is the amount of lift that can safely be achieved without compromising the structural (and, occasionally cosmetic) integrity of the home.
Lifting a home can take 2-3 hours.
Not all homes are lifted due to structural and cosmetic concerns; however, homes fitted with helical piers are then considered stabilized as they won’t sink any further.
5. Final Walkthrough
Subsequent to the structure’s lift and/or stabilization, a final walkthrough takes place. This walkthrough involves a cursory visual of the previously affected areas, with careful attention paid to:
- Previous stucco cracks
- Previous drywall cracks
- Previously sloped floors
- Chimneys (chimneys often have their own, mini foundation)
In addition to visual cues, floor elevation measurements are taken again to compare to the floor elevations during the initial foundation inspection.
Dalinghaus is Here to Help
If you live in Southern California or Central Arizona and have already had your foundation inspection, but you’re. not sure you can afford Helical Piers, click the link below to see you financing options.
If you don’t live in our backyard, thanks for reading our blog! Check out our article on foundation settlement below –


One Response
Can you place a helical piers under a window